- Published on
Deploy a Go and Svelte mono repo using Render and Netlify
Let's say you have a web application that you would like to deploy to production for your users to use, how would you do it?
In this article, I'll demonstrate how to deploy a fullstack web application using Render for the Go backend and Netlify for the Svelte frontend.
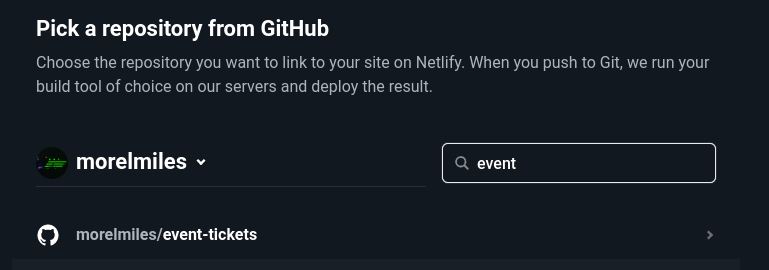
Here's the link to the code ready for deployment https://github.com/morelmiles/event-tickets
Tech stack
- Go
- Gorilla Mux (PS: It's deprecated now)
- PostgreSQL
Jump ahead
Deploy the Go backend on render.com
First things first, sign up for a free account on render.com - No payment details required
Select web service from the menu
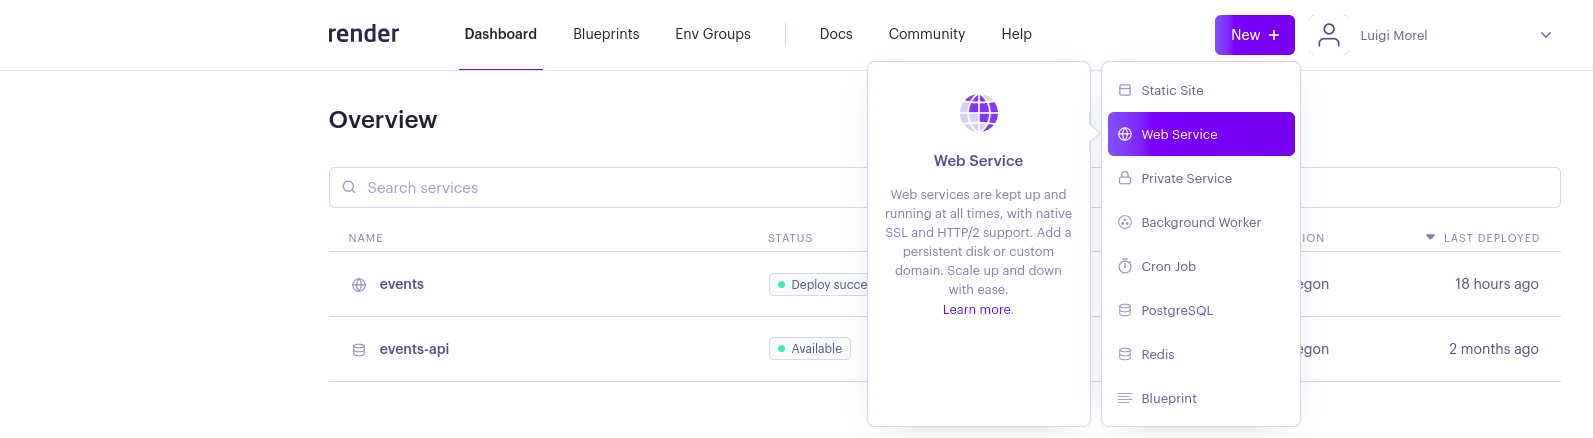
Connect a repository (you could use Github or Gitlab)

Fill in the details for you application

Name is how you'd like to identify your service. I used
eventsRegion is where you'd want your service to be deployed. Use the one nearest to you.
Branch is the Git branch you'd like to deploy (ideally one that has the latest changes)
Runtime is your service's tech stack. We are using Go
Build command specifies how you'd like to build your application. If you take a look at our repository, you do realize that the
main.gofile resides in thecmd/app/directoryThe command
go build -tags netgo -ldflags '-s -w' -o app cmd/app/main.gobuilds our binary and the resulting binary output is saved as
appBuild command is us running the Go binary from the
Build commandstepSelect a free instance for your service (I'm assuming you did not provide payment details )
Then, hit the
Create Web Servicebutton at the bottom of your screen
- You will then be redirected to the build page. See if you have any errors or your service gets built successfully
For my case, I have an error (It's intentional )

At this point, ensure that your service is running successfully.
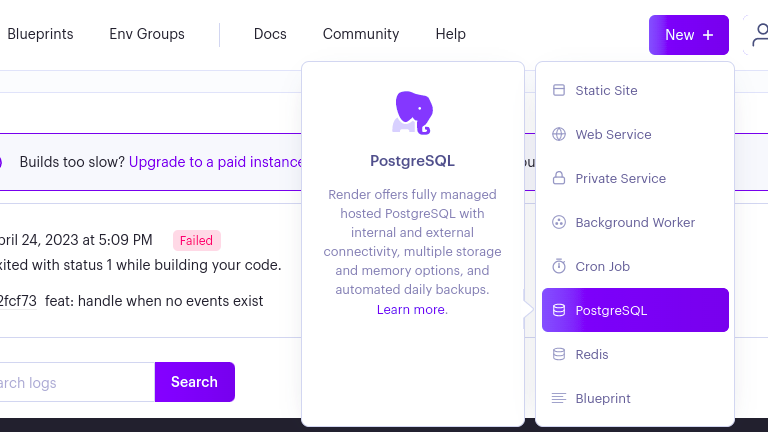
Setting up a database
- Create a new database
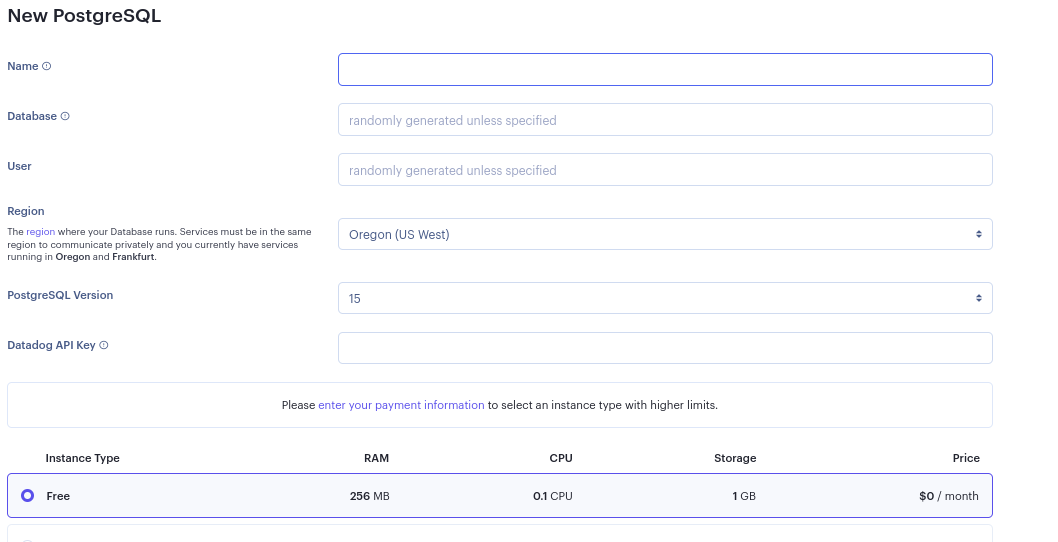
- Fill in the details for your dabatase
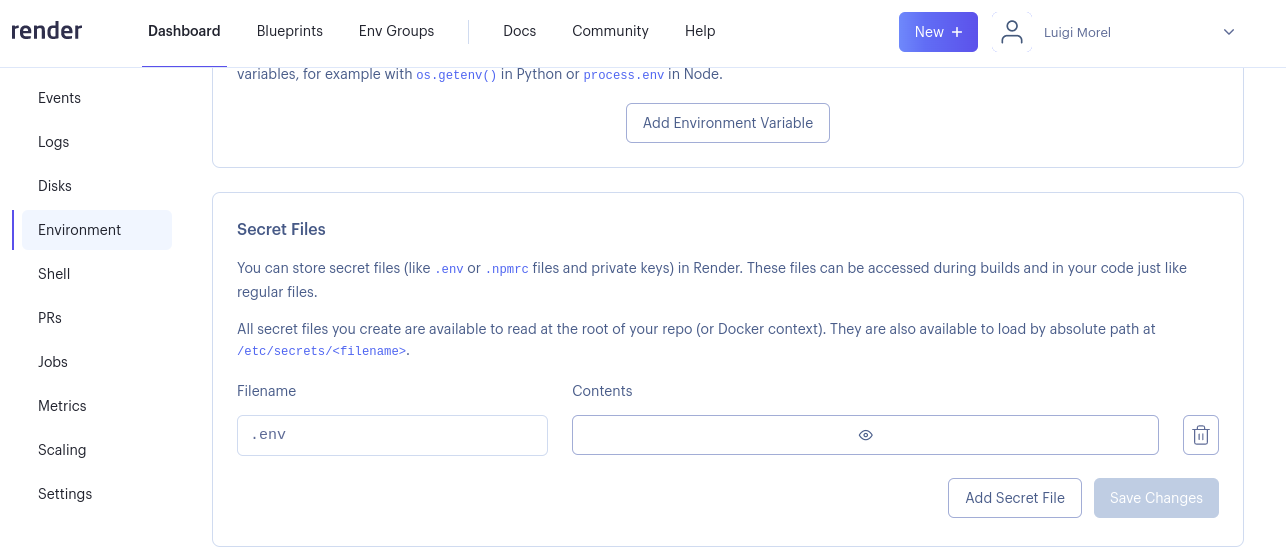
- Go to the
Environmentsection of your web service and upload your.envfile containing your database details
Deploy the frontend on Netlify
- Select the repository you'd like to deploy
- Add details to your deployment
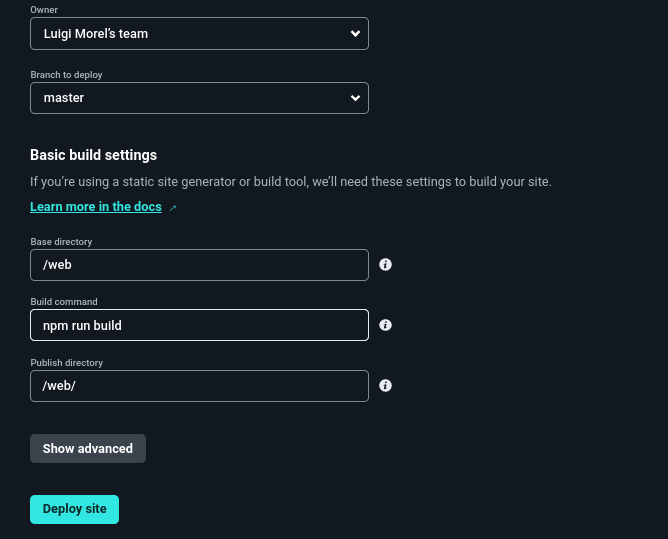
Note: Deployment of Svelte to Netlify requires the usage of an adapter. Here's the documentation SvelteKit on Netlify
Conclusion
And, that's it! You've successfully deployed a mono-repo web application.
Let me know what your thoughts are about this article hi[at]luigimorel.com. Cheers!